Meta Quest 3S is the headgear released by Meta as a spiritual successor to Quest 2. The Quest 3 is the genuine successor, however it is a pretty pricey item ($500), making it unlikely that it will have broad general appeal. The Quest 3S slightly downgrades the Quest 3 by reverting to the old Quest 2 lenses and display while retaining the Quest 3’s new chipset and mixed reality capabilities. This hybridization of the two most recent Meta headsets results in a device capable of running the most recent VR and MR games while remaining affordable at $300. Meta hopes to use this method to democratize Mixed Reality. Will it succeed in its mission? I believe so, and throughout this review, I’ll tell you why
Specifications
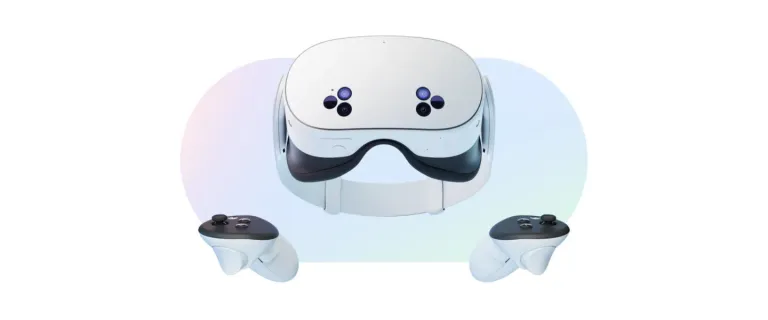
- Resolution (per-eye): 1,832 × 1,920
- Display Type: Single LCD display
- Refresh Rate: 90Hz
- Lenses type: Fresnel
- Processor: Snapdragon XR2 Gen2
- RAM: 8GB
- Battery Life: 2–3 hours
- Field of View: 96° horizontal, 90° vertical
- IPD Adjust: 58mm, 63mm, 68mm
- Weight: 514g
- Storage: 128GB or 256GB
- Connectivity: USB, Bluetooth, Wi-Fi 6
- Tracking: inside-out
- Mixed Reality: RGB passthrough
- Audio: Integrated microphones, no headphones 3.5mm jack
Unboxing
During the Rift CV1 era, I enjoyed unboxing Oculus headsets since they provided an excellent package experience. Previously, Facebook/Meta offered more traditional packaging. I’m pleased to report that the unpacking experience for Meta Quest 3S has once again been excellent. Watch it in my unboxing video.
The amazing thing about this is that as soon as you pull the small handle, the box immediately opens like a surprise gift, revealing the headset and controller. On one of the edges of the box, you can notice a brochure with the words “Start here” that provides a fast start instruction for the gadget. This is ideal for beginners, as they are quickly guided through the use of their first headset. I’m not sure who designed this box, but I already adore him/her. Quest 3S provides the best unpacking experience of a Meta headset in recent years.
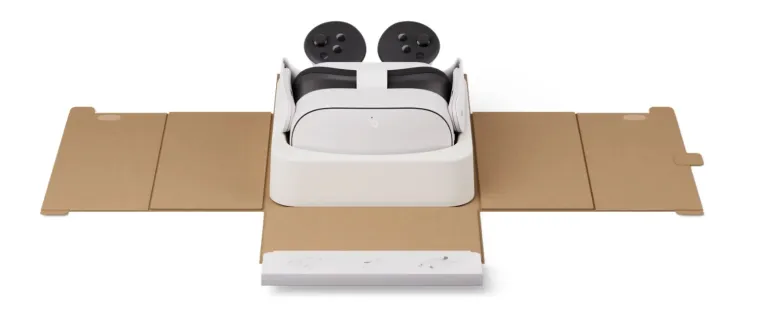
The box is pretty compact and contains:
- The headset
- The controllers (with the AA batteries included)
- The power adapter and a charging USB-C cable
- A glass spacer
- Some pamphlets
Design
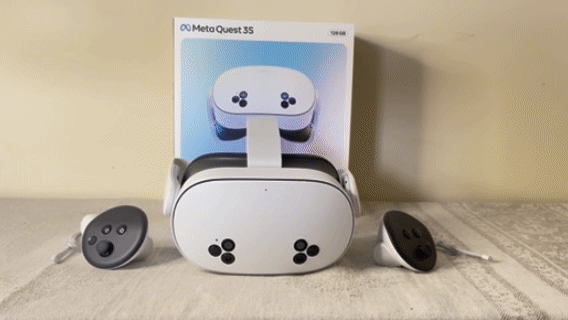
Meta Quest 3S has the same sturdy design as previous Facebook/Meta headsets. The item is definitely well-made, with strong plastic. I particularly like the white hue, which contrasts with the all-black color of old-school VR headsets, especially since it is balanced by the black of the facemask and the top of the controllers.
What I don’t like about the headgear is its overall form, which appears to be a combination of Oculus Go, Meta Quest 2, and Meta Quest 3. The six cameras on the front give me the impression that the headgear has pimples. Furthermore, after using a smaller headset like the Quest 3, the Quest 3S feels like a return to the shoebox shape of the past, which we must abandon if XR is to become more socially acceptable. Fortunately, I don’t have to look at it when wearing it.
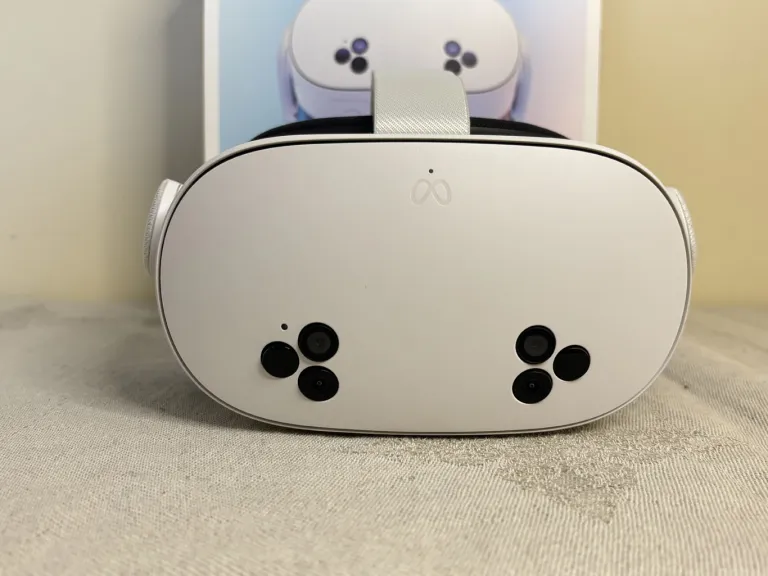
Analyzing the headset’s components, we can see the Meta logo on the front, the RGB cameras for passthrough, two tracking cameras, and two IR illuminators. When the headset engages the cameras, an LED illuminates (for privacy notification). And what appears to be a little microphone.
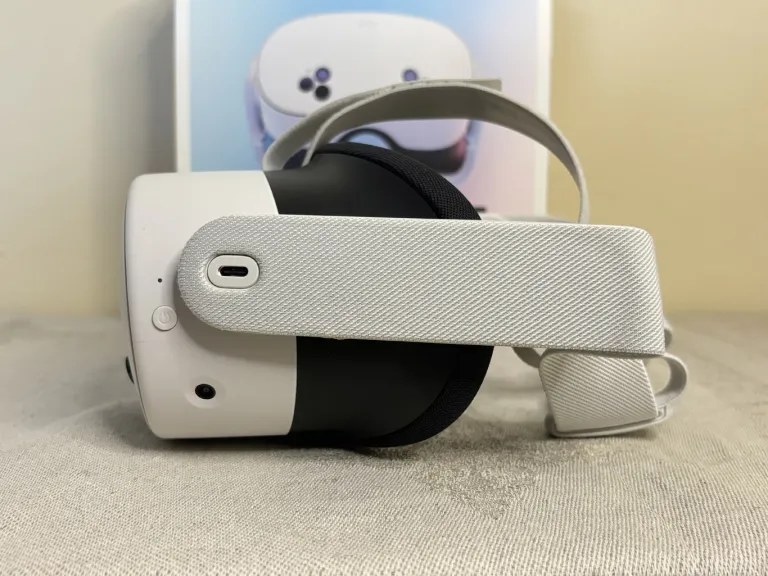
On the left side, there is a button that turns on/off the headset and displays its status LED. There is also a USB-C charging port (with the same Oculus logo form as on the Quest 3) and a tracking camera.
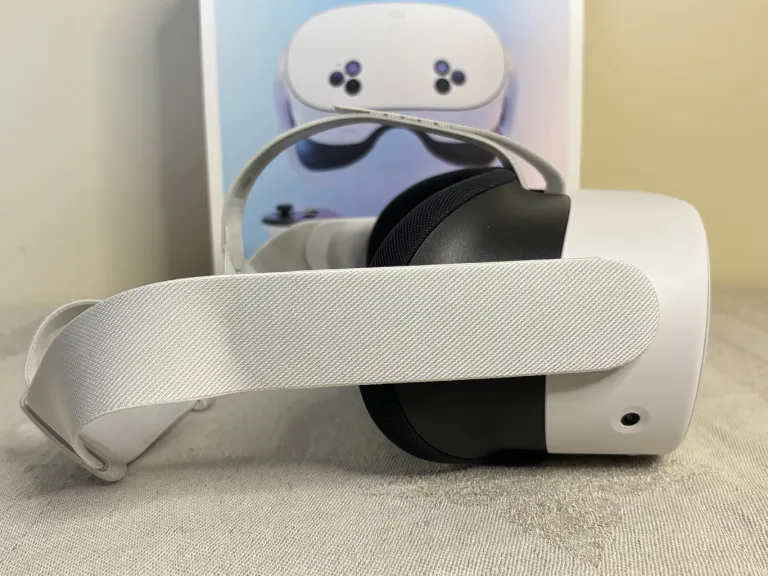
On the right side, there is another tracking camera. It’s also worth noting that there is no 3.5mm jack for external headphones.

From the top, you can see the device’s overall form and fitting mechanism, which uses an elastic band similar to Quest 3. The headset’s two temples also have integrated speakers.
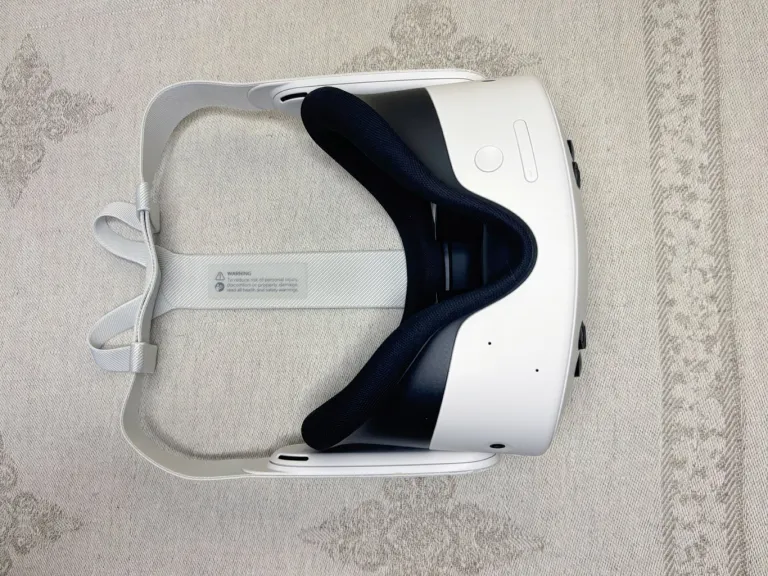
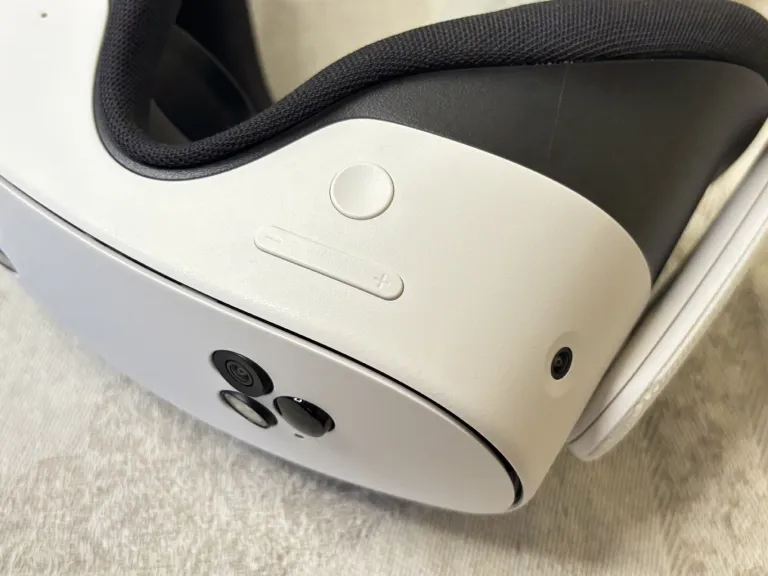
The volume buttons, two integrated microphones, and the Action button, which allows you to transition between worlds, are located at the bottom.
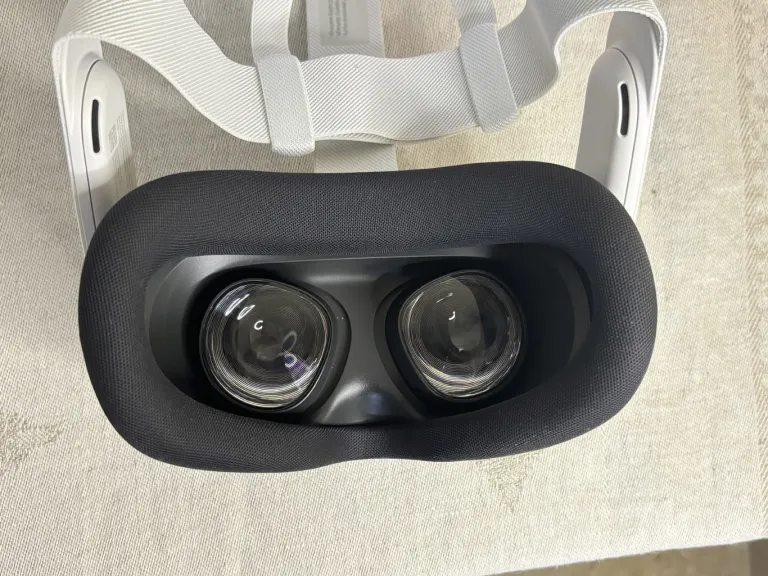
Looking inside the headset, you can see the fabric-covered facemask and the two Fresnel lenses, which can be moved in three steps to accommodate IPD. It’s also worth noting that there isn’t a sensor to identify when you’re wearing the headset.
Visuals
The visuals are the area where I felt the most decline from Quest 3. When I put on the Quest 3S, switched it on, and saw the Meta logo, I went like
The difference is stark: Quest 3S has 1,832 × 1,920 pixels per eye, whereas Quest 3 has 2064 × 2208 (approximately 30% more). Quest 3 also has pancake lenses, which have fewer artifacts than the traditional Fresnel lenses used in Quest 3S. Not to mention the improved IPD adjustment and double display on Quest 3. So, if you’re a regular Quest 3 user, utilizing a Quest 3S will feel like stepping back in time. I did a side-by-side comparison, and the lettering in the Meta Quest 3 UI is obviously clearer, and the colors feel more vibrant.
But don’t get me wrong: the visuals on the Meta Quest 3S are actually fantastic, and if you’ve never tried better ones, either because you’re new to VR or because you’ve come from older headsets like the Quest 1 or 2, you’ll be satisfied. The quality is fairly great, and the text in the UI is easy to see. The screen door effect is present but minimal: you see a grid of pixels but can’t really focus on it. You won’t see it unless you’re specifically hunting for SDE.
The FOV of 96° x 90° is likewise acceptable. It’s like looking through binoculars, yet it’s wide enough to allow you to fully immerse yourself in VR environments.

Lenses do not have a wide eye box, and chromatic and spherical aberrations are easily noticeable if you do not look forward. Artifacts, such as blurred images (spherical aberrations) and colors beginning to breakdown into rainbows (chromatic aberrations), become increasingly visible as you get closer to the lens’ periphery. Meta is often fantastic at correcting these things through software (particularly the chromatic aberrations), so I expect this to improve over time.
The pictures are far from ideal, yet they are decent enough that I thoroughly enjoyed playing Batman: Arkham Shadow on Meta Quest 3S. After a few days of using the Quest 3S, I was able to re-adjust to the previous display and utilize the headset without too many complaints.
Comfort
Quest 3S is equally comfortable as its brother headsets. The fitting mechanism consists of an elastic headband with velcro on top to allow you to adjust it until the headset fits nicely on the top of your head, and two cursors on the back to tighten it to match the diameter of your head. It is not the best fitting mechanism ever, but it suffices as a basic one. Furthermore, because it is thin and made of cloth, it allows you to lie down on a bed while wearing the headset.

The main downside of this approach is that it does not counterbalance the headset’s front weight at all. Devices like the Pico 4 and Vive Focus 3 have the battery on the rear, which makes them incredibly balanced. The Quest 3S is quite front-heavy, and after an hour of constant use, I begin to feel pain in my face and need to take a break.
The basic facemask is quite comfy and feels good on my skin. If you use the Quest for fitness frequently, you can also purchase a variety of extra accessories. The normal facemask is constructed of cotton, which readily absorbs sweat or becomes dirty due to makeup.
The Quest 3S lacks an eye relief feature, but it does include a glass spacer that moves your eyes away from the lenses if you wear glasses. IPD adjustment is mechanical, although it only provides three choices. You must alter it by physically grabbing the lenses and pulling them closer or farther away. I don’t like this because it’s difficult to modify the IPD while wearing the headset.

Overall, the Quest 3S headset’s comfort is adequate, but like with its siblings, if you want higher comfort, you should purchase some additional accessories. One of the benefits of Quest 3S is that there are already many accessories available, particularly since a large number of Quest 3 accessories are also compatible with Quest 3S.
Controllers
Meta Quest 3S uses the same controllers as Quest 3: Touch Plus controllers, which are a development of the original Touch controllers by removing the tracking ring, which might be inconvenient when your hands are close together in-game.
The controllers contain the standard controls: two buttons and a thumbstick on top, along with a system button, and two triggers on the handle, one for the index (trigger) and the other for the middle finger (grip).

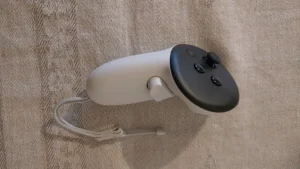
The controllers are comfortable, but I always get the same sense with other VR controllers: my hand does not totally fit them, and you must optimize your hand stance for the trigger, grip button, or thumbstick. It’s practically impossible for me to get them all to fit neatly in my hand. It is right that the menu button is difficult to press since it needs you to bend your thumb significantly: this is done to avoid unintended usage of the button, which could take you out of the application you are now using.
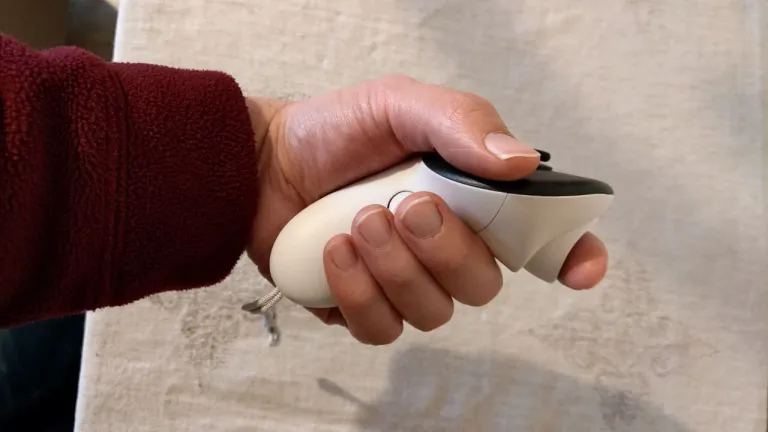
Another thing I would have preferred was a rougher plastic handle to improve grip. In any case, the controllers are fine; the problems I’m referring to are extremely high-level polishes.
Controllers need a single AA battery. The battery lasting time is fine, but I have the impression that the batteries in the Quest 3 series do not have the nearly unlimited endurance that Quest 2 did.
There is also haptic feedback, which is not as strong as in some other controllers (e.g., the Quest Pro), but it is subtle enough to be more than satisfactory in XR experiences.
Let’s look at the tracking in the next section.
Tracking
The headset’s tracking is as stable and precise as Meta’s on Quest headsets.
The controller tracking is also quite good, with a few minor glitches. The Touch Plus controllers rely on a combination of IR LED tracking and hand tracking to function. Hand tracking is required because the removal of the tracking ring provides the tracking algorithm with fewer IR reference points about the controller, particularly in certain poses. This sensor fusion normally works quite well, but it has some downsides. For example, if you withdraw your hands from the controllers, they are no longer tracked. This is rarely an issue in consumer use cases, but it can be obvious in research projects. For example, when I tried to track a biscuit box with a Touch Plus controller, I couldn’t since the headset required a hand to be attached to it.
Because hand tracking is always more uncertain than IR LED tracking (because tracking hands is difficult, whereas identifying bright little points is relatively simple), I believe that when your hands are in a peripheral position, the tracking may suffer slightly when compared to previous controller models. But I can assure you that as long as the controllers remain within the visual FOV, I saw no problem. Anyway, if I check for faults explicitly, I can identify some minor ones: for example, if I almost fully occlude the second controller with one hand, the tracking of the other controller begins to drift somewhat. However, this is a very unusual situation. In general, tracking the controllers is fantastic.
Hand tracking is highly accurate and precise. It can track both hands even when they move quickly and their fingers tangle with one another. It’s remarkable, and it’s probably only one minor step behind Ultraleap, the industry’s gold standard. This is also why hand tracking can help with controller tracking. Hand tracking is one of the areas where Quest 3S outperforms Quest 3. This is because the headset has two IR lights mounted on its front plate, ensuring that the hands are always lighted and that tracking can be performed under optimal conditions.
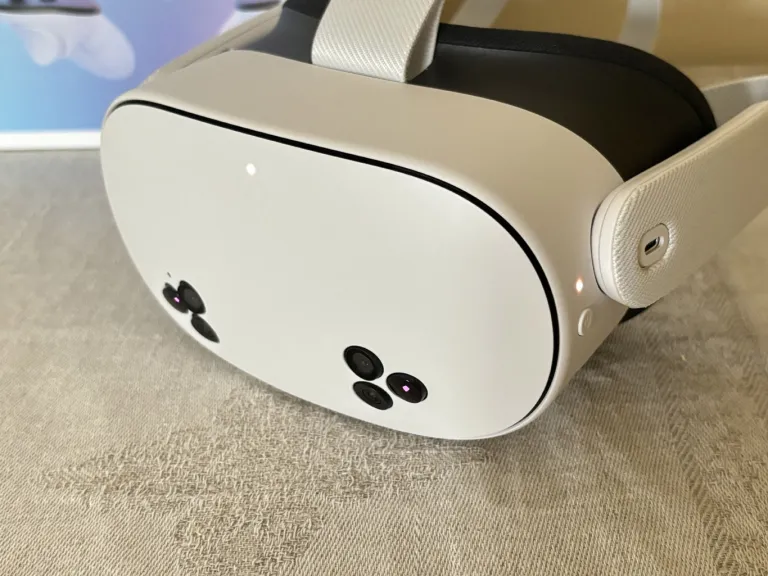
Even when everything around you is pitch black and the headset’s positional tracking fails, the hands remain precisely tracked. When combined with a comfortable head strap, this headset allows you to view movies or do other activities while lying in bed.
Audio
The Quest 3S comes equipped with two inbuilt speakers that are adequate for gaming. If you are an audiophile, you have the dilemma of not having a 3.5mm jack to connect your high-quality audio headset, thus you will need one that supports Bluetooth or USB connection. This is quite inconvenient because I usually use my headset without headphones, but when I need more privacy, I attach some cheap earphones to it. This is not possible with Quest 3S. So, if you watch “movies,” you must pick between the night hand tracking of Quest 3S and the 3.5mm jack of Meta Quest 3 for audio privacy. This is a hard decision.
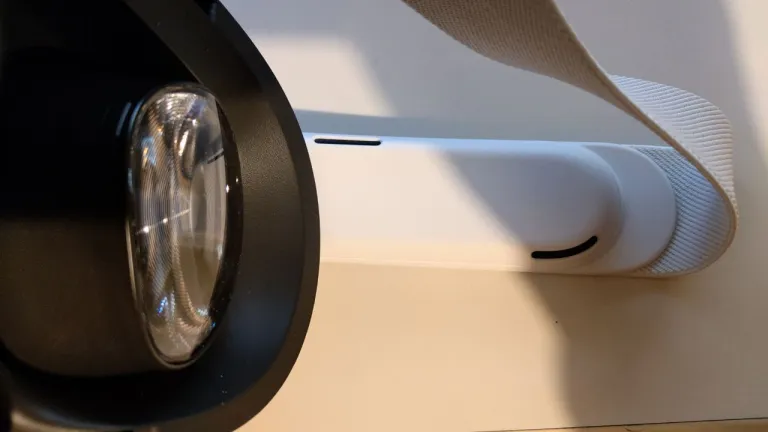
Fortunately, there is still an embedded microphone. I tried using it to register my voice, and while the quality isn’t great, it did a passable job even when I pronounced letters like “P” or “B,” which often cause problems with cheap mics.
Battery
The battery of the Quest 3S has a nominal life of 2.5 hours when in use. It’s adequate for casual use of the headset, but when you’re immersed in a wonderful game like Batman: Arkham Shadow, you’d like to have more juice. If you use the headset frequently, you should consider purchasing one of those head straps that has an extra battery.
When the headset is on standby, the fact that you must actively switch it on by pushing the power button ensures that the battery is not mistakenly exhausted while it is in your backpack, which is a benefit.
Computational power
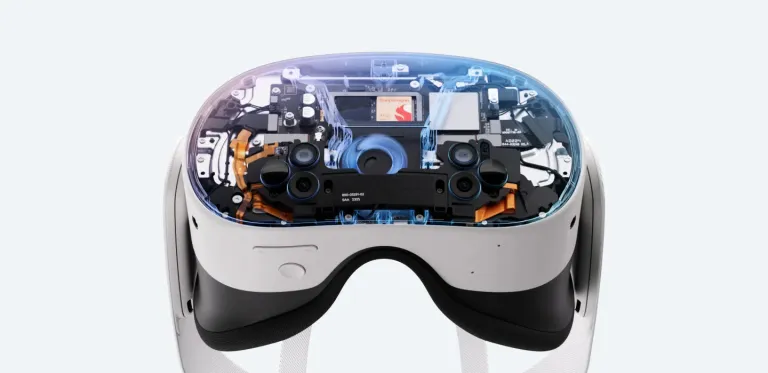
The Qualcomm Snapdragon XR2 Gen2 chipset powers the Quest 3S, as well as the Quest 3. It is a fairly capable mobile chipset that allows the headgear to run games like Red Matter and Batman Arkham. This is one of the most significant improvements to this gadget over Quest 2: the difference in computational capability is noticeable. And certain games that were previously impossible on Quest 2 are now possible on Quest 3 and Quest 3S. And, since the chipset on Quest 3S needs to drive a smaller display, I’m guessing there’s a little more area for game logic than on Quest 3.
I learned that permitting games with excellent visuals, such as Batman: Arkham Shadow, is more vital than a display update. The human brain is amazing at filling in gaps, and when I felt like Batman because I had a dynamic shadow that showed my shape as Batman’s, I was so taken with it that I didn’t search for the screen door effect. Such stunning graphics (including dynamic lighting) were not achievable on Quest 2, but they are now available on Quest 3S. This helps me understand Meta’s decision: if amazing games are possible because to the new chipset, typical folks won’t care as much about not having a decent display. In any case, games seem better on Quest 3S than on Quest 2 because, while the display resolution is the same, the render resolution on Quest 3S is higher due to the XR2 Gen 2, resulting in clearer images.
The fact that the Quest 3 and Quest 3S use the same chipset is significant for enabling a new generation of content with higher visuals and attracting more users to XR.
Mixed Reality
Another feature offered by the new chipset is RGB passthrough. Quest 3S is a mixed reality headset, just like Quest 3. Meta describes it as the most cheap consumer MR headset. Another factor contributing to market uniformity is that both the Quest 3 and the Quest 3S feature similar passthrough, allowing developers to build mixed reality content that works across the entire new generation of devices.
The Quest 3S does not have a depth sensor like the Quest 3, but it does have IR illuminators that let the tracking cameras see the area around you better. It may still perform somewhat worse than Quest 3 on some meshing tasks, such as reconstructing the contour of the room around you, but in general, it still does great work on all the mixed reality tasks.
The visual quality of the RGB passthrough is definitely good, and when I put it on my helmet, I believed it was exactly the same as Quest 3. However, after some accurate side-by-side testing, I discovered that the Quest 3S passthrough has somewhat lower quality, with the Quest 3 having more definition and bright colors. I can use my phone while wearing both devices, but the Quest 3 allows me to read smaller writing more easily.

Anyway, the passthrough is so good that I was able to use my phone while wearing both headsets, first through the Meta Quest 3 passthrough and then the Quest 3S passthrough. I couldn’t read the little print, but I could still launch apps and navigate the windows with larger font. This reveals a lot about the notion of passthrough for these devices.
When you move your head, the Passthrough on both Meta Quest 3 headsets experiences motion blur, especially if your room is not well-lit.
Quest 3S also has a dedicated Action button that allows you to quickly convert from AR to VR. If you’re at the main menu, hitting it switches between seeing your physical room and your virtual house, and vice versa. This is quite useful, and far superior to the double touch required by other Quest headsets that suffered from misdetection issues. I believe this button might be used not only by the main menu, but also by all XR applications to convert from VR to MR mode (if the experience allows for it).
Standby mode
To turn on the headset, hit the power button. After not being used for a time, the headset goes into standby mode, however when you try to put it close to your head again, you will realize that it does not turn automatically like prior Quest headsets. This is because, shockingly, this device lacks a proximity sensor, which means it cannot identify when you are wearing it. This strategy has advantages and disadvantages.
As previously stated, the headset consumes less power while in standby mode and cannot be turned on accidently. In addition, because there is no sensor, you no longer need to cover it to turn on the headset during development tests. However, having to manually turn it on every time you put the device on your head is inconvenient if you need to put your headset on and off repeatedly, such as when debugging your application.
Software
Initial setup
The setup for the Meta Quest 3 is similar to that of the other Quest devices. You place it on your head, turn it on, and then follow the on-screen directions. To complete the initial configuration, you must install the phone companion app and create a Meta account. The first time you switch it on, it takes some time for the headset to update and setup itself, but the rest of the process is rather straightforward.
As soon as the installation is complete, you will be given three fast tutorials: one for the Quest main menu, one for passthrough vision and the use of the Action button, and one for hand interactions. I adore how quick and effective these tutorials are. They are useful for training folks on how to use the device for the first time.
After the instructions, a movie demonstrates the headset’s capabilities, including gaming, fitness, and social VR experiences. This is a good idea to advise VR beginners on what to do with their first headset.
In the early phases, the user can also customize his or her avatar to be ready for social VR gaming. There are millions of conceivable adjustments, and Meta boasts one of the most inclusive avatar configurators in the entire XR sector.
User experience
The Quest runtime, known as Meta Horizon OS, is increasingly powerful, but the user experience remains clumsy. One of Meta’s main faults, in my opinion, is that it is attempting to force its fu**ing Meta Horizon Worlds down our throats in every manner possible, and as a result, it is destroying the headset’s design in order to highlight its own social network world. The overall focus of the UI appears to be on getting you into Horizon Worlds rather than making it easy for consumers to accomplish what they want to do, which is locate decent games. Don’t even get me started on the companion app’s user interface: I believe there is a special spot in hell for individuals who created it to make it tough to grasp how to setup the headset while making it simple to find worlds on Meta Horizon Worlds.
Aside from focusing less on Horizon Worlds, Meta should completely overhaul its user interface to make it more usable. Anyway, even if it’s not ideal, you’ll get used to it.
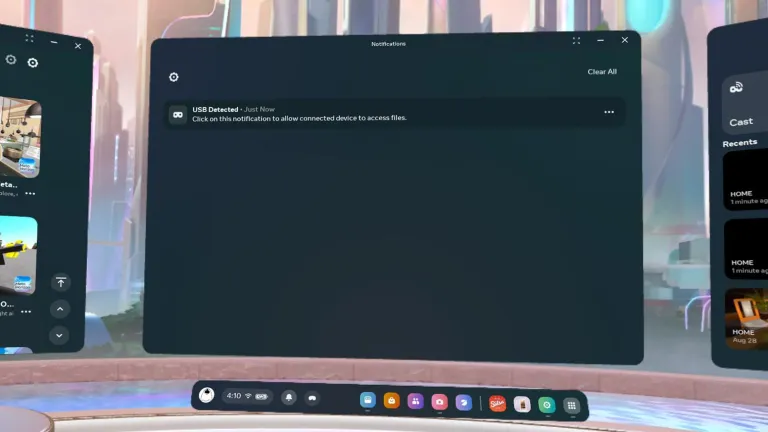
If you’ve never seen the Quest UI, I can tell you that there is a taskbar that displays the time of day and allows you to access the settings, your avatar configuration, the store, the list of notifications, the screen capture functionality, the library of content you own, a useless feed with suggested content, and some shortcuts to the most recently opened application. You can open 2D apps on large screens and position them around you, or 3D apps in an immersive environment.
Content
Quest headphones became extremely popular for two reasons: affordability and content. On this device, content reigns supreme, and it can draw from Meta’s extensive content repository. There are old favorites like Beat Saber, popular hits like Gorilla Tag, new incredible games like Batman: Arkham Shadow, social meetings like VRChat or Rec Room, and fitness titles like Supernatural or XR Workout. There are large and tiny indie titles. There is a lot of content to play, and more excellent games like Metro Exodus and Alien will be released shortly. Aside from games, a variety of apps cater to industries such as productivity, meditation, and lifestyle. Yes, there’s also my Unity Cube.
Remember that this is also a mixed-reality headset, and Meta is heavily investing in mixed-reality content, so expect plenty of MR experiences in the future. We currently have wonderful MR games like Starship Home, but I expect to see many MR utilities like Pencil! coming shortly. When Meta publishes Augments, we will be able to have widgets all about us in our physical room.
The only issue with content at the moment is that the Meta Horizon Store’s suggestion engine isn’t operating properly. Following the merging of App Lab with the main store, the store is now cluttered with shovelware that should not be displayed on the front page. Meta should improve this by recommending the most appropriate content for each user, whether it be AAA or indie games.
If you’re seeking for experimental material (such as cloud rendering), you can still find it on SideQuest, the “unofficial” Quest store.
Price and availability

The Meta Quest 3S is available in most Western nations for $300 for the 128 GB SKU and $400 for the 256 GB model. In Italy, the initial price, including VAT, is €330. You can buy it from the Meta website or an authorized reseller such as Amazon. I hope that at some time, this headset will be accessible for purchase in additional countries (e.g., Latin America).
The pricing is a selling point for this headset: €330 for such a capable headset that can run fantastic VR games, work in mixed reality, and provide access to such a diverse range of content is a steal. I’m not sure how much money Meta loses on each single unit because it’s clearly not being sold for profit, but it’s definitely making a significant investment to make mixed reality more widely available. With the winter holiday season approaching, this is an ideal present for tech enthusiasts and children.
Final considerations
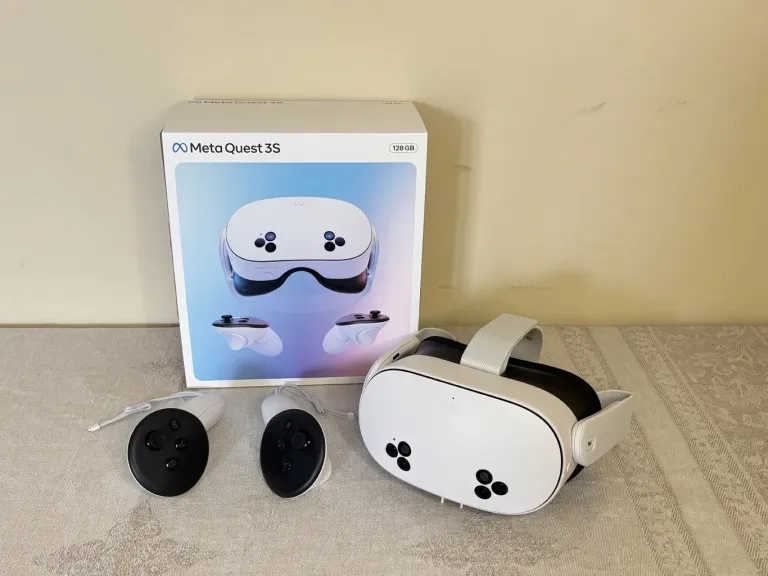
The Meta Quest 3S is a solid headset, but not the best standalone on the market. But it is undoubtedly the one that provides the best value for your money. For about $300, you can bring home some of the top games on the market and play them on a high-performance headset. And here is a headset that can provide both VR and MR with high-quality passthrough. Meta is democratizing mixed reality by putting it in the hands of as many people as possible, which differs from Apple’s strategy.
Visuals are a step down from Meta Quest 3, although they are still adequate for most uses. Tracking is excellent, controllers function properly, and audio is enough for most applications. When you acquire it, following a simple setup, you can immediately play Batman: Arkham Shadow, which is included for free, and fall in love with virtual reality.
I believe this is the best headset for normal users that want to play XR games. It will undoubtedly be a smash this holiday season, increasing the adoption of VR. In my estimation, this headset will sell approximately 20-30 million units over its lifetime, similar to the Quest 2.
Should you buy it?
You should absolutely buy The Meta Quest 3S if:
- You are looking for a consumer headset that is easy to use and has great content
- You are looking for a standalone device
- You don’t have the Meta Quest 3, Pico 4 Ultra, or another superior headset
- You are on a budget
Do not buy it if:
- You already have the Meta Quest 3 or you have the money to buy a Meta Quest 3
- You are a fanatic of PCVR or PSVR games
- You need a headset for professional use: spend a bit more and get a Meta Quest 3, which has superior features. Or buy a Pico 4 Ultra Enterprise if you need a headset for your company


